Friday, February 3, 2012

My top five favorite blogs!

I am currently working on something super cute for SmittenBee' room. I can't wait to share it. I really thought I would be done with it today but school has kicked my behind this week. Three big test plus two weeks of assignment catch up, on a class that has had technical difficulties :P

So here I am taking an extended break, visiting my favorite blogs. I follow five blogs that I just love. Some give me ideas and inspiration. Some have great tips and techniques for crafting. Here they are in no special order


Free Pretty Things for You is full of gorgeous vintage freebie printables. Tons of vintage inspired crafts too. Keren, the blog owner also designs for Shabby Blogs.


The Krazy Coupon Lady is the best extreme couponer around. While I am not extreme, I do love to get great deals. Heather and Joanie do a great job of breaking down product sale's to receive the best deal.

Pretty Handy Girl Blog


Pretty Handy Girl is a great source for DIY projects. That girl knows how to use her power drills.


The Small Things Blog is a girly-girl blog. Kate has a never ending list of posts on how to's about hair make-up and style.


Girl In Air is everything I wish my blog to become. She is my inspiration. Michell shares all sorts of craft tutorials.


Tuesday, January 31, 2012

Will you be my Valentine?

The truth is I like Valentines Day better than any other holiday. It's not because the pretend romance or the lovey dovey gifts (okay, maybe its the chocolate a little). It is because everything is so pretty. I love Valentine's Day decor!! Red, pink and pastels everywhere; hearts, cupids, puppy dogs with sad eyes.

The thing I love best though, are the Valentine's day cards. Especially vintage ones. They are so sweet. With sayings like, "Wool you be my Valentine? I needle lots of romance" or "I'd be upset if you say no, Canoe be my valentine?" how could you not love them. They really used to know how to charm a lady :)


from funnyordie 


Aren't they just splendid! Because of my love affair with Valentines day, I have a few different valentine's card ideas. I will post them through out the next week or so. Maybe I will be able to inspire you to make your own homemade cards this year.

To Gnome you, is to love you!


My gnome nephew volunteered to pose for a valentines card! Ain't he too cute! 

To create the gnome costume make a cone hat. Cover the hat with felt or any extra material you have lying around. Using the printable below, trace and cut out the beard out of felt. Attach the beard to the hat by string or cutting the side burn area of the beard extra long like I had. Add a few extra touches and Viola!


Sunday, January 29, 2012

i made it with photoshop!

I self taught myself photoshop. I am not even close to an expert. But for knowing nothing just six months ago, I have have learned a ton just from YouTubing tutorials. This time I made a few logo's for Hub's cousin, Keri. She teaches Zumba locally.

All you local gals out there, come try it out! The first class is always free. 


What do you think. Pretty cute, huh? The last logo "peace, love, zumba" she had put on shirts.  Check her out on facebook.

Tuesday, January 17, 2012

Book Review: Winter Garden

get it here

Kristin Hannah is known for her excellent tear-jerkers. Winter Garden is no exception. The book’s about the consequences of an absence of a mothers love on two sisters, Meredith and Nina. Meredith is closed off to everyone and Nina runs away from everyone.  It’s easy to see why, after the way their mother, Anya, treats them though.  Anya was hard to like. From the beginning, you can tell she has a deep dark secret which is the reason why she is so detached from her daughters. It was difficult to excuse her behavior towards her daughters, even after you find out her awful, I mean down right horrific story.  The beginning was a little slow, but grabbed you by the heart soon afterwards. Good read for a cold night while cuddled up under a blanket.

Monday, January 9, 2012

The Low Down about: Paint!

Spray Paint:


     I love spray paint. Painting large projects with gallon or craft paint, more often than not, leave paintbrush streaks, and oh how I hate those streaks. Spray paint seems to look more store bought not hand made.

Spray paint adheres to most materials, but you must match paint to project. If you are painting plastic, for example, make sure you have paint made for plastic. Spray paint is also time saving. Instead of waiting hours for coats to dry, it take minutes.

Spray paint is more pricey though.The two brands I like the best are Krylon (has a great nozzle) and Rust-oleum Painter's Touch 2X Coverage. When spray painting make sure to always primer the project. It will save money in the long run and pave way for the best results. I like Rust-oleum primer but Kilz works well too. The sheen of the paint is up to you. I usually choose satin  for it is easier to wipe down.

When painting use a back and forth motion. The paint should start off the side of the project and end up off the other side of it. If the project will be handled a lot, say like a table, I recommend sealing it with a polyurethane.


Gallon Paint:

 
      First off don't buy cheap paint. Cheap paints have a higher percentage of solvents (up to 70%). Meaning cheap paint has tons of water in it. Which in return, evaporates and leaves little color behind. This is why you end up re-coating fourteen different times with the cheap stuff lol.

Latex paint- Most common, water based and environmentally safe. Clean up with just soap and water. Latex paint is almost odorless and dries fast. This paint can even prevent mildew and moisture. Exterior and interior of your home can all be painted with Latex paint. But be aware that allergies to latex include this type of paint!

Oil based paint- I don't use oil based paint or Alkyd paint much. Latex can handle almost any job oil based paint used to be known to only do. Oil based paint usually is used in wet areas like bathrooms. But they take forever to dry, smell awful, need paint thinner for clean up and release bad chemicals (volatile organic compounds) into the air. I did use it to paint the interior of my camper trailer though.


Crafting Paint


When it comes to crafting there is a paint for every project. Acrylic paint can be used for an array of projects. Just remember it dries very quickly. Mixing paint can sometimes be a problem for that reason. There is also specialty paint like magnetic and chalkboard paint. My favorite paint lately is Martha Stewart's new Acrylic paint . You can paint almost any surface; wood, fabric, glass, plastic, metal! And  even better the paint it dishwasher and washing machine safe. Best paint ever, right? There is 160 gorgeous colors too.


Speaking of Chalkboard Paint here is how to make your own super easy!!

 Start by picking ANY shade of flat-finish latex paint. Pour 1 cup of paint into a container. Add 2 tablespoons of unsanded tile grout. Mix with a paint stirrer, carefully breaking up clumps. Apply paint with a roller or a sponge paintbrush to a primed or painted surface. Work in small sections, going over the same spot several times to ensure full, even coverage. Let dry. Smooth area with 150-grit sandpaper, and wipe off dust. To condition: Rub the side of a piece of chalk over entire surface. Wipe away residue with a barely damp sponge.

Monday, January 2, 2012

Craigslist Revamp: Free Cabinet

I have an confession, I am a Craigslist addict. I lurk CL hourly! So when I spotted this cabinet FOR FREE only minutes away from my house, I had to have it. Okay so the craigslist picture was taken from a distance and a bit diseving. But it is super sturdy and FREE!

The top drawers were jammed and had awful locks on them. I fixed it right up with wood filler and a LOT of sanding. I painted the cabinet with white latex paint left over from the laundry room walls. 

Once the base was dried and even more sanding, I distressed the cabinet with stain. I applied dark stain around the edges and other random spots I sanded with a rough brush. I wiped the stain off with a rag almost immediately after applying it.

Finally satisfied with the results, I painted a coat of polythene and added handles.  The handles originally came from T-birds captains bed. Since I keep everything, I still had the hideous gold floral handles lying around. While a fresh wash of white looks better, I am still not completely happy with the handles. Maybe a dark bronze color would look better.


Friday, December 30, 2011

Happy New Year

Just wanted to drop in and wish everyone a HAPPY NEW YEAR!! Stay safe and have fun :) See you again next year (I know I'm a nerd, but I always love to say that). Here's to the year of the Dragon.........

A quick hellooo

I am uber busy with all the holiday festivities. I have been dying, all day, to share my cupcakes I whipped up this morning. I gave myself permission to quickly post them just in case there is  still someone out there who is in need of  an idea, something EASY, YUMMY and FAST.  So here ya are copy away..........

Tuesday, December 27, 2011

Free Gooseberry Patch CHILI Cookbook EXPIRED

update: EXPIRED!
Yessss! Gooseberry Patch has a digital copy of a Chili cookbook on Amazon for FREE!


Get a taste of Gooseberry Patch in this collection of over 20 favorite chili recipes. Grab a spoon and dig in! Warm, hearty and oh-so-delicious, we've included plenty of recipes for your one-pot family favorite in our Chili cookbook. Try southwestern chili casserole, Grandpa's favorite chili and oh-so-cheesy chili dip.

 mmm mhm Can't wait to try out some of these. My BumbleBee lives and breathes on Chili!


Wednesday, December 21, 2011

Personal Party Planner: Sesame Street

Theme:
Can you tell me how to get to (child's name) Birthday Party? and Today was brought to you by the letter S and the number 1 (child's initial and age) or Sunny days keeping the clouds away

Colors:
Primary, Elmo Red, Big Bird Yellow, Cookie Monster Blue, Oscar the Grouch Green, Ernie Orange

Invitation:
A few I liked from Etsy stores


Decorations:
Big Bird Feet walking up to party (printable freebie here)


Use the template to cut out Big bird foot prints on yellow construction paper. Place foot prints walking up to party. . . like on side walk or a trail!


Pom Pom Characters


I love these poms I made! I rounding Burt and Ernie's tips, cutting Big Birds at a sharp point and the monsters with a perfect triangle cut. I purchased a PDF file of the faces from IParty (her etsy store is suddenly gone) for $7. I printed the images out on full sheet mailing labels to make the face stickers. You can then re-use the file for many more things, balloons, favor bags, and more.

I think Whirly rainbow lollipops would add a great pop of extra color.


 I hand painted this sign for my twin nephew's birthday. It really added a great piece of decor for just pennies.


Games:
Cookie Monster fur tissue game printable freebie here Have the image blown up and purchase Cookie monster blue tissue paper and a glue stick. Have each kid, blindfolded or not, glue the "fur-small pieces of tissue" onto Cookie's body.
Ernie's rubber ducky game
Stock up on rubber duckies. You can get them at Oriental Trading for as cheap as $4 per dozen. Hide the duckies throughout the party place. Explain to the kids Ernie lost his rubber ducky and he is very sad. Have a scavenger hunt for the rubber duckies. Make a cute sign with game title and a sad Ernie to put close by.


Oscar's trash can toss
Buy a small silver trash can or you could also paint a picture of a trash can to wrap around a bucket. Crumble up paper or old newspaper or do it after presents and use the wrapping paper and toss it into Oscars can. Make sure to add another sign. A stuffed Oscar would be super cute too.


Food:
Recipe Card also here


Elmo's goldfish
Fill three or so small beta fish bowls with blue jello. Place a few swedish fish inside the jello to look as if they are swimming.  A thrift store may have bowls for cheap. Add a tag saying something like Dorothy's family or Elmo's Goldfish with a picture of him. Put the note on a stick and poke it into the middle of the bowl.


Cookies Monsters Cookie and Vegetable tray
Add a note nearby saying something like Eat your veggies before your Cookies with a picture of Cookie Monster on it.


I made Cookie Monster cupcakes in a prior post here. You can easily make Elmo too.


Prior to the party, I also like to put a scoop of ice cream in a cupcake liner and refreeze. It makes for  faster pass out. Don't forget to put a special label at each station food, game, presents, etc. It really helps add special touches of decor without spending much. I am a big fan of labeling food and games for extra decor.


Favor:
i am totally stealing the favor idea from my Sister-in-law. Super Grover Capes!! They were similar to the ones below. But all she did was make small red capes and attached a letter G to the back with Stitch Witchery. They were absolutely adorable.

Sunday, December 18, 2011

Book Review: Unbroken

Get it here

By Laura Hillenbrand

Laura Hillenbrand brings life and excitement to the usual snore stories of war.  It took seven years for Hillenbrand to write Unbroken mostly because of the extensive research.  Unforgettable hero, main character Louie Zamperini, stories are told by factual accounts of World War II.  Hillenbrand has a way of sharing uncommon facts that most are not aware of. I learned surprising information about the war. It was, at times though, difficult to read about the prisoners of war. Hillenbrand spared no cruel or brutal detail. I read through this quickly compared to other nonfiction, but I did have to walk away from it a couple times because of the intensity.  One of the best books I have read this year. Would be great for a book club, she left plenty of room for discussion.
Recommended.

Friday, December 16, 2011

Vintage Trailer Trash

1967 diamond in the rough is what I have here. I am absolutely GIDDY to restore the trailer. I have big plans for it including white and black checkered linoleum, chalkboard paint, a white wash, red painted oven, texture and more texture, and a toys-camping-playing-vintage kind of theme. Here she is in all her glory.


Lots of potential, right? I just love the original vinyl in perfect condition, on the counters, table, and bathroom shower and sink. Crazy after 45 year there is still original details. The green room separator is great and the original magazine holder is still in the restroom. There are some details that absolutely have to go like the curtains!

 The latest owners changed the couch seating area to a permanent bed. I am not sure what I want to do here yet. My husband wants to leave it and build a dresser/storage area at the foot. I would love it in its original loveliness with a couch though. But the bed is SUPER comfy and huge. Hmmmm. . . all the possibilities :)

I think I may paint him white with tan detail. Not sure yet. Primary colors with a vintage touch, is what I am invisioning for my beauty right now. But hey, it may change. When i made the inspiration board below, I hadnt thought of sharing it. If these are yours or you know whos there are let me know, so i can give proper credit where proper credit is due :)


I found this absolutely inspirational blog The Vintage Housewife. Miss Cat remodeled a 1953 trailer that is too die for. Of course pink from top to bottom, with the cutest vintage touches. I only dream, one day, I will have my own 50's rounded trailer to transform into pure vintage love. Drool over her trailer.


I have made one purchase for my happy camper 
So what if its not truly vintage, it only cost $3.99 at WorkSports and its fully functional just in case.

Wednesday, December 14, 2011

Mustaches with Martha

     Recently while perusing the craft store, I stumbled upon a new multipurpose paint from Martha Stewart Crafts.  The back reads:
                   Use on wood, glass, metal and fabric. Indoor/Outdoor. Water based.
                 Non-Toxic. Weather Resistant. Shake. Dry 1 hr between coats. For Glass:
                   Clean surface with alcohol. Cure 21 days. Top-Rack dishwash.

     Glass? I couldn't believe it. I have always used Pebeo Porcelaine Paint. This would not only simplify the process, but also add a wide range of colors to use. What could I test the new miracle paint out on? Mustache mugs, of course. I have seen a variety of these babies floating around, and have been dying for an excuse to whip some up. Here are my clever mugs 21 days after painting.

And they made it through the dishwasher. Yipee! Oh Martha, how you continuously knock my socks off.

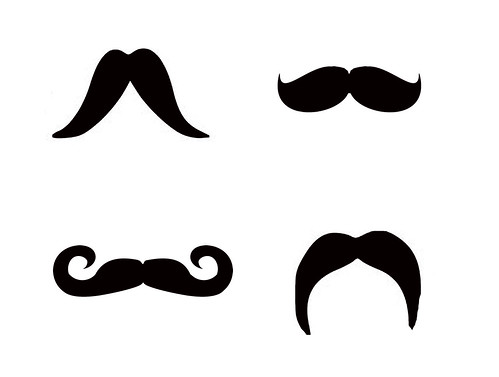
mustache


Also that night, T-bird needed a class treat. So we quickly through together 26 mustache suckers. So cute!


Tuesday, December 13, 2011

Secret Santa

Sssshhhh, don't tell. My Mother-in-law asked me to whip up architectural photography art for family. Look how they turned out. Super easy with photoshop :) I made eight of these but the Briggs family was my favorite. I just loved the "I". I purchased all the photos from multiple sellers on etsy.


I even turned it around and made one for her (They are avid outdoorsmen) I googled for these photos. I forgot to write down where I got them so if they are yours let me know please.

Saturday, December 10, 2011

Cookie Monster Cupcakes

     Me want cookie! Me want cookie in cupcake!

Quite a few tutorials have been circulating around for these adorable Cookie Monster cupcakes, but when my sister-in-law asked me to help make 80 of them, I realized the recipes I'd seen, would have to be simplified. So for all those out there with little time, large quantities needed, bad bakers, or tree-nut allergies, here is what we did. 

1. Baked the perfect cupcakes,
 cut a slit just above the wrapper, and added a small cookie.
I used Target brand (like chips ahoy) cookies.

2. Blend store bought white frosting and NEON blue food coloring.
Must use neon, with regular blue you must use too much coloring and
the blue still isn't bright enough in my opinion . Use a star tip to apply fur.
I found it easiest to add fur under cookie first, then finish the top.

3. Turn white chocolate melting chip upside down and add black dots for eyes.
Perfect eyes is what sets apart the good and the bad I found.
So be sure to make the pupils M&M size with one pointing up and
one pointing to the left or right. I have seen a lot of people use
M&M for eyes but my sister in law wanted black and
that would have cost an addition eight dollars per forty.

Easy and Cookie Monster approved!