Friday, March 23, 2012

The Drive In's

T-Bird has been awesome at school lately (20 days in a row on perfect behavior!!) He totally deserved a celebration. He asked to invite his cousins over for a movie and treats. I thought that was a perfect idea, but I just had to add a little PIZAZZ to the event. And that is when I came up with a Drive In Movie Party!

When the kiddos got to our house, we all sat down at the table and decorated License Plates. One of the boys did his in hieroglyphics LOL It was a great activity to calm down from the excitement of a party. 

(after the cars were all decorated)

After taping their finished license plate to the back of their car, we decorated large boxes (I have to admit, it was hard to find four large boxes for free) like cars, while watching an episode of Spongebob learning to drive.


After their cars were done, I gave each child a driver's license; a rectangle sugar cookie with a mock driver's license iced on it (I spaced taking a picture). Giving the kids permission to drive to the movies and park :)

As the kids got settled into their cars, we watched Cars, and I cooked nachos. Perfect Drive Ins food.


They all were still hungry after nachos, of course. So as I put in Cars 2, I passed out cute paper popcorn bags overflowing with popcorn and licorice just like the drive ins.

The kids had soo much fun and just loved their cars. All four little ones stayed in their boxes for almost every minute of the nearly five hours.

J won Best Car! Look at the killer flames down the side ;)


Tuesday, March 20, 2012

Thrift Store Revamp: Timeout Bench

Not sure who made up with the saying Terrible Two's, but apparently they hadn't reached the Three's yet, because I tell ya, they are soooo much worse!! I am thinking the phrase should be reconsidered and reclaimed as "Terrible Toddler's". Much more fitting, don't 'cha think?

As you can probably tell above, Ms. Bumble Bee's got a attitude and is a little trouble maker! So when I found this absolutely adorable timeout bench at the thrift store over the weekend, I had to grab it. Exactly what she needs, a spot all her own when in time out. 

 
I couldn't leave it how it was though. Someone had doodled all over it, and the left front corner looked chewed on. I bet by a Terrible Toddler.  

After sanding, three layers of spray paint, first white, next black, then creme, and more sanding, I am pleased with the final result.


Okay, so I went a little overboard on the aging effect.  But it's my favorite part of revamping. I love sanding layers off, exposing different colors underneath. I love love love the yellow, blue, and red just barely peeking out beneath the other paint layers on the letters. Now it has so much character!

Of course, I have to share a picture of the timeout bench in action.


Sassy like mom probably wasn't the right shirt for this photo opportunity, but I had to capture that lip.


Monday, March 19, 2012

Top Ten favortie Crafting Glues


1. E-6000. I love this glue! I use it for tons of different crafts. It is great for adhering unlike items like glass to wood, or metal to glass. It's thick, dries clear and will not break down over time. E-6000 is a very heavy duty glue, with a strong odor, so make sure you use it in a well ventilated area. Also make sure you have plenty of space and time for drying process. 


2. Beacon Zip Dry I use this glue for all my paper projects. It dries clear and quickly. Remember a little goes a long way.
 
3. Mod Podge You can basically use it for everything.It works as a glue or sealant! When using as a sealant, paint on a thin layer. After drying you can always add another layer.

4. Aleene's Tacky Glue Works great and easy to use. Great glue to use for kids crafts. Longer drying time though. 

5.  Gorilla Glue Can use on a variety of projects. Works great on wood to wood crafts. Remember glue expands, so be modest.  

6.  Scor-Pal Scor-Tape Favorite double sided tape.
 
7. 3M Styrofoam Adhesive Spray Only glue I have used that does NOT ruin Styrofoam

8. Aleene's Fabric Fusion Permanent Adhesive Can use on any type of fabric, and it's machine washable. 
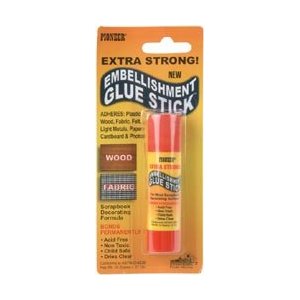
9.  Pioneer Embellishment Glue Stick. Best glue stick around, works perfect for gluing embellishments to paper.
 
10. HOT GLUE GUN When all else fail use the glue gun :)


picture source: amazon for all

Tuesday, March 13, 2012

Friday, March 9, 2012

Dining Room Art

There has been a large, blank spot on the wall,  in my dinning room area for a few months now. I needed to fill it in quick for my sanity. What do I want to hang there though?? 

A week ago or so, I decided this had to be dealt with.......NOW.

 I searched the web and other blogs but found nothing. I bought  a few decor magazines and still came up empty handed. I looked through my Pinterest and still not a thing was catching my eye. . I was completely stumped.

 Until I remembered prior to finding Pinterest, I would save pictures of decor ideas to multiple folders on my desktop. In the dining room folder, I found a couple pictures of  plates hanging on the wall. I  fell in love all over again. 

 I did NOT want to go out and purchase expensive matching decoration plates. I hit up my local thrift store and figured out to look only for shape and detail in a plate, and not judge it on its color.

I found seven completely different plates that I loved. I also stopped by the local hardware store and picked up two bottles of Rust-oleum's Painters Touch Ultra Coverage in gloss white.

These are the plates i found, in all their prepainted glory. (I later replaced the sharp angled one on the right side with a much cuter one with a doily look)


So as you can see, these plates would look hideous on the wall grouped together. But after two coats of white spray paint they look FABULOUS!


The trick to hanging the plates are DiskHangers. I forgot to take a picture of how the disk hangers work. This is a picture from their website.

It was so easy to hang the plates with these. Well worth the cost, which isn't bad.

Hope you all have a great weekend.

Thursday, March 8, 2012

DIY Canvas Tutorial

Would you like a fun and easy way to create a photo canvas without breaking the bank? I have trying to come up with a way to show off picture with a artistic quality. 
Do you see all the texture and loveliness of the canvas? And it only cost me $2.60 (I did have all the supplies on hand besides the Gesso).


Supplies
8" x 10" Canvas
1 Sheet of Strathmore Tracing Paper (found in the art/drawing aisle)
Acrylic paint, I used black and dark brown with a touch of gold
Mod Podge
Gesso
Paintbrush
Ink Jet Printer


  First print a black and white photo onto the tracing paper.

This can be a little tricky. Be patient. I finally taped the tracing paper to a sheet of copy paper, since my printer wouldn't take the tracing paper alone. Be sure the ink is completely dry before handling the tracing paper. 
You can choose any color of acrylic paint. I wanted an old rustic look to the canvas though, so I choose black and brown. Pink may have been cute if I was going to put it in her room.
 I had flat canvas on hand, so I used it. But I think this project would awesome on a regular canvas with an 1/2 edge or thicker.

Apply the paint to all four sides of the canvas and to the edges on the front. Allow to dry.
Next apply Modge Podge to the front of the canvas, in the area where you will be placing the tracing paper, over lapping the painted area.


 Lay the tracing paper, print side up, onto the area where Mod Podge was applied. The paper will naturally ripple, creating a textured effect. Apply paint around the edges of the tracing paper to blend into the edges of the canvas. Again, let the canvas dry before moving on.

  Mix a small amount of Gesso and paint. This will create a tinted overlay onto the photo. Once dry apply the mixture over the entire canvas. This coat will seal the canvas.

Now you have a beautiful DIY canvas for much cheaper than any print shop could have made!


Tuesday, March 6, 2012

Let me introduce the Mouse's


Who doesn't love Mickey and Minnie Mouse? About two weeks ago, I made these matching mice for an avid all things Disney fan. Didn't they turn out cute? Since I could not make black spackling, I had to hand paint them. But it was worth the time because she just loved them!